Roof flashing is a critical, yet often overlooked, component of a well-functioning roofing system. This thin sheet of metal is installed where the roof meets vertical surfaces—such as walls, chimneys, skylights, or dormers—to direct water safely away and prevent infiltration.
Typically made from galvanized steel, aluminum, or copper, flashing forms a durable, water-resistant barrier. Without it, water could easily seep into the vulnerable junctions of your roof, leading to moisture damage, mold, and structural deterioration.
At Presidential Construction, we know that effective roof flashing is the backbone of long-lasting weather protection. Let’s dive into why flashing matters and explore the most common types and materials used today.
Why Is Roof Flashing Important?
Flashing shields the areas of a roof most susceptible to water intrusion—such as seams, valleys, vents, and junctions—by rerouting water toward the shingles and into the gutters. In short, flashing ensures your roof drains efficiently without letting moisture sneak in where it shouldn’t.
On asphalt shingle roofs, flashing is installed over the underlayment and beneath the shingles. On metal roofs, it’s typically placed at the top of the panels. Regardless of roofing material, flashing plays a vital role in keeping your home safe and dry.
12 Common Types of Roof Flashing
Flashing types differ based on where they are installed. Here are the most widely used options:
1. Base Flashing
Placed where a vertical structure intersects with a roof, base flashing allows for movement caused by expansion and contraction. It’s often used in combination with counter flashing.
2. Step Flashing
A rectangular, bent piece of metal that’s layered between shingles along a roof-to-wall junction. Step flashing prevents water from slipping into the seam between the roof and vertical surfaces.
3. Chimney Flashing
Custom-fit flashing is used around chimneys to block water from penetrating around the base. It typically includes base and step flashing elements.
4. Counter Flashing
Installed over step flashing or masonry, counter flashing provides extra coverage, guiding water away from areas where vertical and horizontal surfaces meet.
5. Drip Edge Flashing
This angled metal strip is installed at the edges of a roof to guide water into the gutters and away from the fascia board, reducing the risk of rot.
6. Headwall Flashing
Used where a roof slopes into a vertical wall, headwall (or L-shaped) flashing ensures that water flows safely over the shingles.
7. Valley Flashing
Installed in the V-shaped valleys where two roof slopes meet, valley flashing redirects runoff toward the gutters, minimizing the risk of leaks in this water-heavy zone.
8. Gutter Apron Flashing
This flashing protects the space between the roof edge and gutters, preventing water from seeping behind the gutter system.
9. Continuous Flashing
Also called apron flashing, this long strip helps seal roof edges where they meet vertical walls, providing a steady, consistent barrier.
10. Skylight Flashing
Manufacturers often provide specialized flashing kits for skylights. When custom flashing is needed, roofers typically fabricate it on-site using aluminum to match the roof structure.
11. Kickout Flashing
Placed at the end of step flashing, kickout flashing diverts water into the gutters, protecting the siding from water damage.
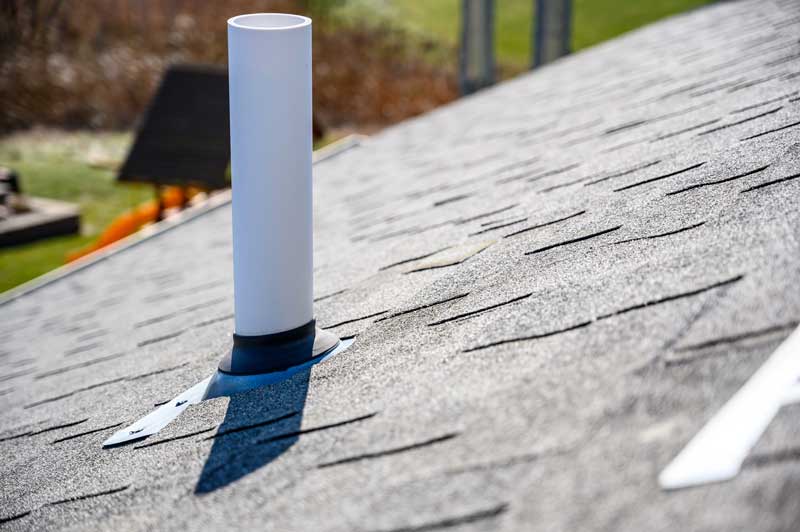
12. Vent Flashing
Also known as vent boots, this type fits snugly around plumbing vents to create a waterproof seal.
Top Materials Used in Roof Flashing
Modern roof flashing is typically made from:
1. Galvanized Steel
A favorite among contractors for its durability, corrosion resistance, and flexibility. Galvanized steel is ideal for shaping to fit unique roof features.
2. Aluminum
Lightweight and easy to manipulate, aluminum works well in many applications. However, it needs a protective coating when used near masonry to avoid chemical reactions.
3. Copper
A premium choice, copper is long-lasting and visually appealing. It’s commonly used on high-end homes or when matching existing copper elements.
Roof Flashing Sizes
Flashing size varies depending on its application:
- Step Flashing: Typically 10″ x 8″, or 10″ x 12″ for slate-look shingles.
- Vent Flashing: Sized slightly larger than the vent pipe for a snug, leak-free fit.
How To Install Step Flashing (5-Step Overview)
Installing step flashing correctly is key to long-term performance. While this should be left to professionals, here’s a quick overview of the standard method:
- Kickout Flashing Installation: Positioned at the roof’s edge and wall base to guide water into the gutter.
- First Step Flashing Placement: Set over base flashing, secured with nails and roofing cement.
- Shingle Installation: Laid over the flashing to cover nails and provide overlap.
- Continue Shingling: Shingles are layered across the roof, covering each step of flashing.
- Repeat Upward: Each step flashing piece overlaps the one below it, guiding water safely downward.
When to Call a Professional for Roof Flashing Repairs
Homeowners should watch for these signs of flashing issues:
- Visible rust, corrosion, or warping
- Cracks, holes, or missing sections
- Leaks near chimneys, skylights, or roof valleys
- Detached or loose flashing
- Deteriorated sealant
If you notice any of these symptoms, it’s time to call Presidential Construction at (651) ROOFING. Our experienced roofers will inspect, repair, or replace flashing as needed to keep your roof watertight.
Roof Flashing Cost Breakdown
Roof flashing typically costs between $300 and $1,500, depending on roof complexity, flashing type, and material. Labor rates average $25–$100 per hour, with many projects falling around $75/hr.
Frequently Asked Questions
Is Roof Flashing Really Necessary?
Yes. Flashing is essential to protect your home’s most vulnerable roof junctions. Without it, leaks and structural damage become inevitable.
What’s the Purpose of Flashing?
Flashing keeps water out by covering roof seams, edges, and joints—especially where different materials or angles meet.
What Does Flashing Look Like?
Roof flashing looks like thin strips or sheets of metal—often bent or shaped to fit snugly along roof contours and vertical structures.
What Happens If Flashing Is Missing?
Without flashing, your roof is exposed to moisture intrusion, leading to rot, mold, and potentially expensive repairs.
Need Flashing Repairs or a New Roof?
If you’re experiencing leaks or suspect damaged flashing, don’t wait for the problem to worsen. Presidential Construction offers expert flashing repair and installation services across Minnesota.
📞 Call us today at (651) ROOFING to schedule a free roof inspection or estimate. We also offer competitive financing and promotional offers.
Here is a flashing manufacturer that we typically use Klauer flashings when roofing or re-roofing houses.